


Real whipped cream has a decadent taste and texture. Whipped cream imposters are convenient, but there is nothing like the real thing!
At the grocery store, there are many different types of milk and cream that are available.
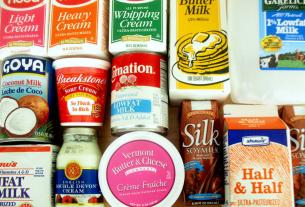
When making your own whipped cream buy whipping cream or heavy cream. The butter fat content of whipping cream allows it it whip and is what gives it that great taste and texture. (My post How to: Milks and Creams will give you a better understanding of many different dairy products.)
It is possible to buy real whipped cream in a can, but even then, you get an airier product that liquefies faster than homemade. So, it’s definitely worth knowing how to whip up the real thing. So let’s get started!
What You Need to Make Whipped Cream
- A carton of whipping cream, (or double cream in the UK.) Some other kinds of cream can be whipped, but not all. Here’s a link which will explain the different kinds of cream and their uses.
- A bowl (metal is preferred for chilling, but you can also use a glass bowl)
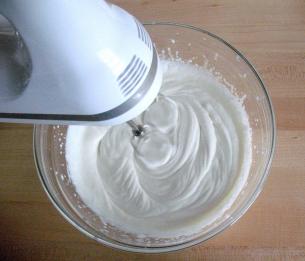
- An electric hand mixer, or a wire whisk

Here Are the Three Easy Steps to Making Whipped Cream
- Start by chilling the cream, the bowl and the beaters or whisk in the freezer for 10 to 20 minutes
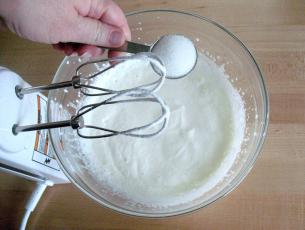
- Pour one cup of whipping cream into the bowl and beat until it holds soft peaks. Soft peaks should fold over when the beaters or whisk are lifted. If using an electric mixer, start on medium speed to prevent splattering, then speed up. If using a whisk, circle it vigorously in the cream, watching as it thickens. It’s a workout for your arm and shoulder! You’ll know you’ve over-beaten it if the consistency starts to turn buttery.
- Once soft peaks start to form, you can add sugar (one or two tablespoons), and any other flavorings you like. Beat again until soft peaks form.
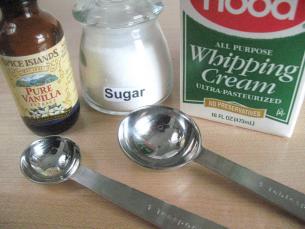
The Ingredients:
Start beating and once the cream begins to thicken (soft peaks). Add 1 Tablespoon of sugar…
…and 1 teaspoon of vanilla extract.

Continue beating…

until the cream reaches desired consistency (do not over beat!).
Tips for a Successful Whipped Cream
- One cup of whipping cream makes about 2 cups of whipped cream.
- For flavoring, one teaspoon of vanilla is often added per cup of whipping cream. But the flavoring possibilities are endless; you can add other flavor extracts, liqueurs, or powdered cocoa. There are lots of flavored whipped cream recipes to try – even bourbon!
- If you’re using whipped cream on a dessert that will be sitting out for a while, adding icing sugar, rather than granulated sugar, in step 2 will help it keep its shape
- Whipped cream can be kept covered in the fridge for about three days – but it will begin to break down if you have not added any stabilizer to it.
How to Use Whipped Cream:
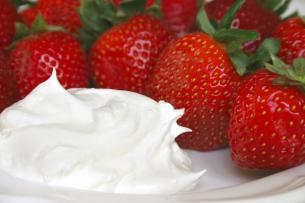
- Put a dollop on strawberries or fruit salad
- Use it to top pies, cakes, fruit crisps, pancakes, French toast or waffles
- Add a spoonful to hot chocolate, or to an after-dinner coffee
- Kids will want to get into it if there’s food coloring involved. Try adding a few drops of their favorite color.
- A dollop on top of a pumpkin pie, pecan pie, or chocolate fudge pie looks great and tastes even better!
If you are new to startcooking, or are a regular visitor here, please consider subscribing for free.


Karen (Pediascribe) said:
My favorite flavoring to add is pure almond extract.
Yum!