


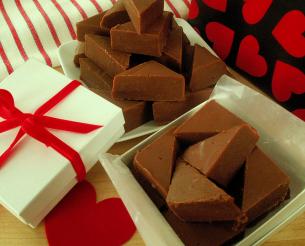
Valentine’s Day is coming up soon, so it’s time to start thinking about chocolate! (Actually, I don’t need a holiday to think about chocolate!)
.
This blogpost is all about learning how to make fudge. Chocolate lovers may also want to check out my post on Chocolate Fondue and…

How to Make Strawberries Dipped in Chocolate.

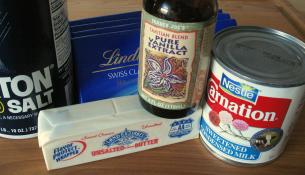
For the fudge you will need:
- 1 pound of fine-quality milk chocolate
- ½ stick of unsalted butter (OR 1/4 cup or 2 oz. or 56 g)
- One 14-ounce can of sweetened condensed milk
- ¼ teaspoon of salt
- ½ teaspoon of vanilla (optional)
.
You may have noticed something weird in that list, and be thinking, why do you use unsalted butter and then add salt to the recipe? The answer is that lots of recipes are written that way, because you have more control over the amount of salt in the recipe with that approach. If you want (or if you have to) you can substitute salted for unsalted butter in this recipe, but your fudge may end up with a noticeably saltier flavor.
There is a HUGE difference between sweetened condensed milk and evaporated milk. This recipe calls for sweetened condensed milk.
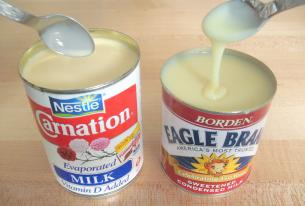
Evaporated Milk and Sweetened Condensed Milk
Evaporated milk has no added sugar and is slightly thicker and richer than regular milk. Sweetened condensed milk is very thick and very sweet. They are not interchangeable ingredients.
Let’s startcooking!
Line the bottom of an 8-inch square baking pan with parchment paper or wax paper. (The original recipe I saw said to line only the bottom of the pan. However, if you cut off a slightly larger sheet of parchment paper and do at least two of the sides as well, it will make it much easier to get the fudge out of the pan after it has hardened.)
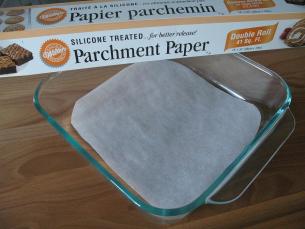
You can buy parchment paper right next to the tin foil and the plastic wrap at the grocery store. It’s specially made to be used for cooking.
For the next step, I’ll first give you a quick overview and then provide more detail.
The quick overview is that we’re going to place a metal bowl on top of a pan of barely simmering water, and gently heat all the ingredients, stirring occasionally, until smooth.
.
Now for just a bit more detail about this step!
You can buy pans that are designed to fit into one another, leaving space at the bottom for water. They are called “double-boilers” and can get pretty expensive. Fortunately, you don’t really need one for this recipe. A regular bowl over a normal pan works just fine. However, you have to make sure that the bottom of the bowl does not touch the water. The whole point of a *double boiler* is to melt/cook things very gently by having the steam from the water (not the water itself) heat the upper bowl!
Put a couple of inches of water in a sauce pan and bring it to a simmer. (No rapid bubbles, just gentle little bubbles!)
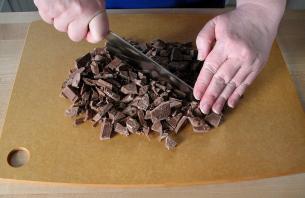
While the water is heating, break up the chocolate into small bits. You could cut it with a knife.
.
Or (and this is the fun version) just slam the wrapped chocolate bar against the counter. When you unwrap it, it should be broken up into bits.
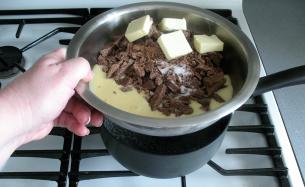
Put the chocolate in a medium bowl. Add the butter, sweetened condensed milk, vanilla, and the salt to the bowl.
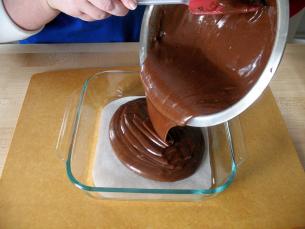
Set the bowl over the simmering water. Give the chocolate mixture an occasional stir. When everything is smooth, blended, and all melted, pour it into the prepared pan (the one with the parchment paper.)
.
Put it in the refrigerator. DO NOT COVER THE FUDGE! (If you cover it, too much condensation will form and ruin your beautiful fudge!) Let it chill for about 4 hours or until it is totally firm and then cover it with plastic wrap.
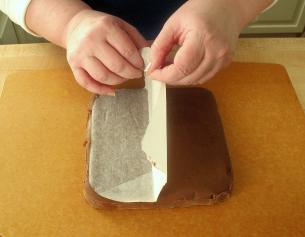
To cut the fudge, run a butter knife around edges of pan and invert the fudge onto a cutting board.
.
I do hope you put the parchment up at least two sides of the pan! Otherwise, right about now you are saying: “She’s crazy, I’m never going to get this out of the pan”! If you can get your knife to the edge of the parchment paper, that should be enough to loosen it. If that doesn’t work, after you have run your knife around the edge of the pan, cut out a small corner. Taste it. (Yes, it’s delicious, and no, you can’t just eat it from the pan!) Now slip your knife under the parchment paper and the fudge should come out of the pan. (This is the hardest step of this entire recipe!)
Remove the parchment paper.
.
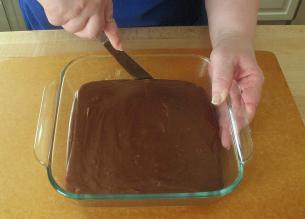
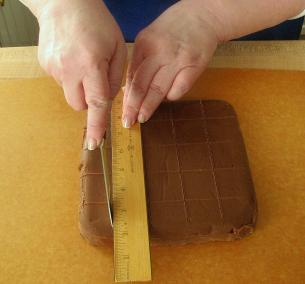
With a ruler, score the fudge with lines about one inch apart. This way you will get nice even pieces.
.
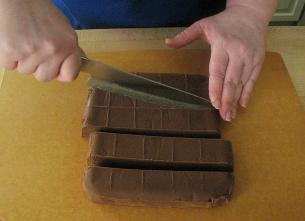
You can slice your fudge ahead of the time you plan to serve it, but store it in the refrigerator!
.
Storing and Serving Fudge:
My kitchen tends to get very warm so I always store fudge in the refrigerator. Store fudge in an airtight tin, with a piece of wax paper between each layer. It should keep on the counter (out of the sun) about 2 weeks, in the refrigerator about 2-3 weeks, and in the freezer about 2-3 months. To keep it really moist, you can store the entire “block” of fudge and only cut it when you are ready to serve it. It’s best eaten at room temperature.
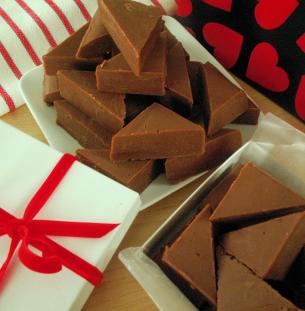
Enjoy!
If you are new to startcooking, or are a regular visitor here, please consider subscribing for free.


Shaula Evans said:
Kathy, this looks absolutely lethal!
I can’t imagine any lasting long enough in this house to be used as gifts…no matter how big a batch we made.
Incidentally, I always have parchment paper on hand, because I like cooking with is much more than tinfoil. Since I almost only ever cook for two, we do a lot of cooking and reheating in our convection toaster oven, and I use parchment paper to line the oven tray.