Hershey Kiss Cookie

posted in Sweets by Kathy Maister
Difficulty:
difficulty rating

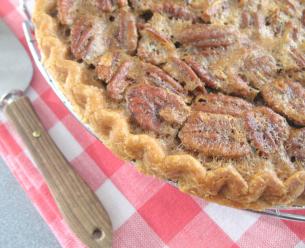
In 1957, Freda Smith from Gibsonburg, Ohio pressed a Hershey Kiss into a peanut butter cookie and history was made! This cookie did not win the 1957 Pillsbury Bake-Off contest, but it become a huge star in the cookie world!

Peanut Blossom is the official title of this classic cookie but it goes by lots of different names including Peanut Butter Kiss Cookie and Hershey Kiss Cookie to name just a few.

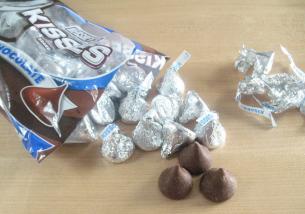
The Chocolate Kiss comes wrapped in silver foil which needs to get removed.

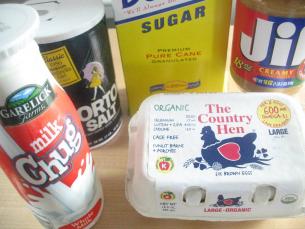
Some of the basic ingredients needed to make the cookie (shown below) may already be in your kitchen –

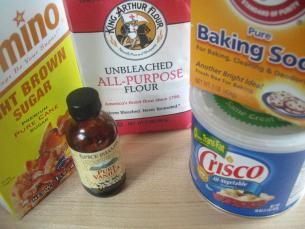
The “baking specific” ingredients (shown below) are –

(Crisco is a vegetable shortening. Be sure to buy the one with zero “trans fats”).

Let’s startcooking!

Measure:

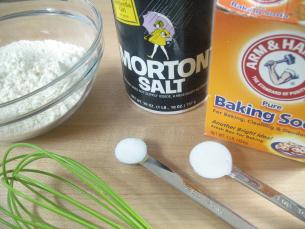
  • 1 1/2 cups of all-purpose white flour
  • 1 teaspoon of baking soda
  • 1/2 teaspoon of salt

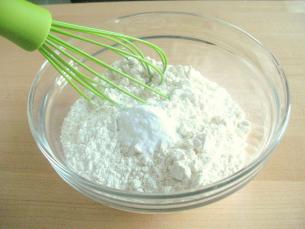
and put these ingredients in a medium bowl.

Using a whisk, gently whisk these ingredients together and then set the bowl aside for the moment.

Measure out, using dry measuring cups,

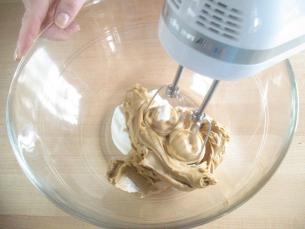
  • 1/2 cup of shortening and
  • 3/4 cup of creamy peanut butter

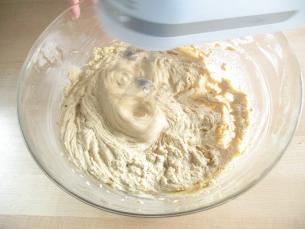
Put the shortening and peanut butter into a large mixing bowl and, with an electric hand mixer, mix until well blended.

Add 1/3 cup of granulated sugar and…

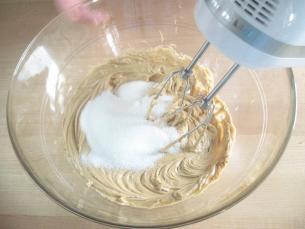
…1/3 cup of lightly packed light brown sugar.

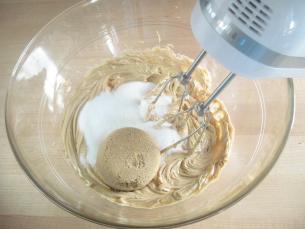
Beat these ingredients together until everything is light and fluffy

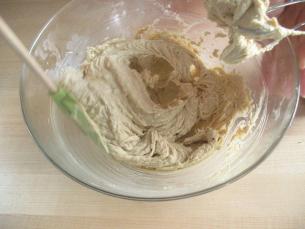
Use a spatula to scrape down the sides of the bowl.

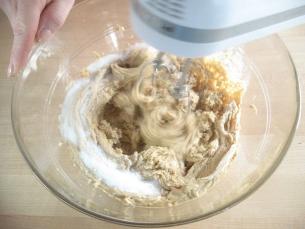
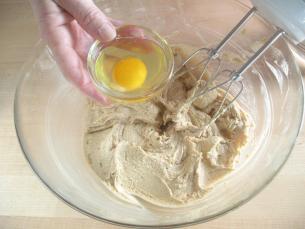
Crack one egg into a small bowl. Check to see that there are no shell pieces and then add the egg to the mixing bowl.

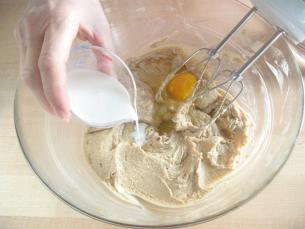
Add 2 Tablespoons of milk and…

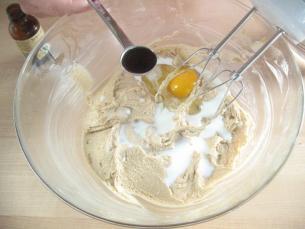
…1 teaspoon of vanilla extract…

…blend everything together…
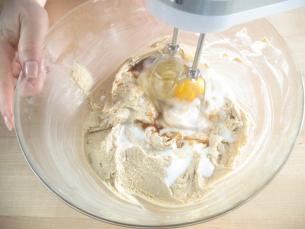
…really well…

…making sure to scrape down the sides of the bowl with a spatula.

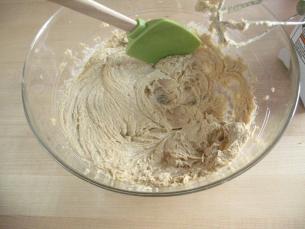
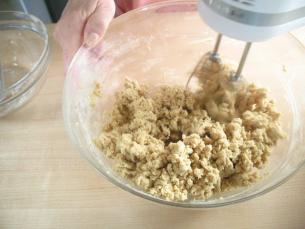
Using a 1/2 cup measuring cup, start adding the flour to the mixing bowl.

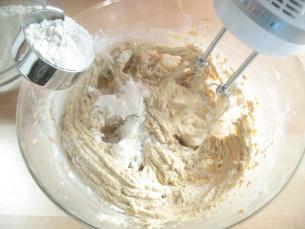
Beat well after each addition.

The batter will become very stiff.

Now we’re going to roll the batter into balls to make the cookies.

This recipe will make approximately 48 cookies. For the cookies to bake evenly, they all need to be the same size. It helps to put all the batter onto a plate and divide the batter into four parts.

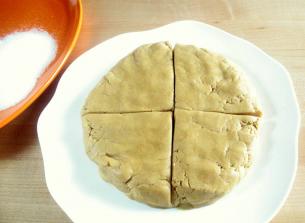
Then divide each part into fours again.

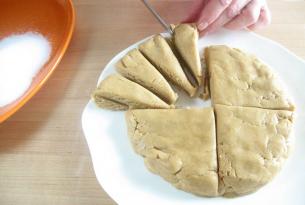
You should now be able to get three cookies from each section.

Roll the cookies into uniform balls…

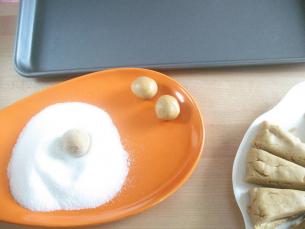
…and roll the balls into some granulated sugar.

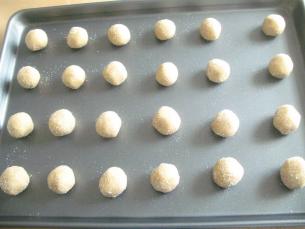
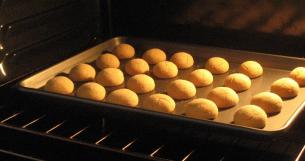
Place the balls on a cookie sheet. (You will have to do this in two batches. The cookie sheet must to totally cool before adding the second batch of cookies.)

Bake the cookies in a pre-heated 375 F. degree oven for 8-10 minutes or until lightly browned.

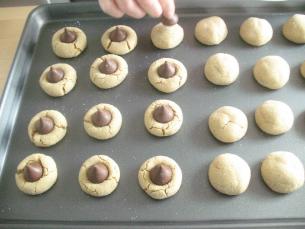
As soon as you remove the tray from the oven, press an unwrapped chocolate kiss into the top of each cookie. The sides of the cookie will crack slightly.

(GREAT TIP from Natalie in the comment section – “While you make the dough and roll them into balls, press a Hershey in each cookie and then remove them so when you bake it there will be no cracks in your cookies.”)

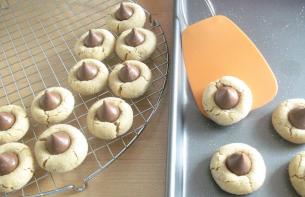
Then with a flat spatula, remove the cookies from the cookie sheet to a cooling rack.

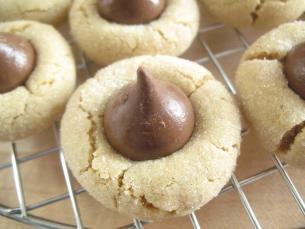
It will take a couple of hours for the chocolate kiss to become totally firm again. Then you can store these cookies in an air-tight tin, between sheets of wax paper, at room temperature. Be sure they are the cookies are totally cooled before storing them. If they do begin to dry out, place a slice of bread on a sheet of waxed paper and put it inside the air tight container. Replace the slice of bread as needed.

Enjoy!

If you are new to startcooking, or are a regular visitor here, please consider subscribing for free.

5 Steps to Perfect Home-Made Gifts from the Kitchen

posted in Sweets by Kathy Maister

This is the year for you to WOW! all of your family and friends with that perfect home-made gift from the kitchen. There is no reason to spend money on gourmet-shop treats when you can make them yourself at a fraction of the cost. All my recipes are designed for the novice cook, so there is no need for you to feel like you are heading to an area outside your comfort zone.

1. Start by making a list of everyone who would really appreciate a decadent and truly delicious home-made gift.

This is not just the “naughty or nice” list. Any hand-made gift will be seen as a gift from the heart just because it shows a bit more effort than a store-bought gift. Let’s face it; some people would be just as happy with a beautifully wrapped jar of olives!

2. Choose the recipe

This is not as difficult as you might think! Have a look at these recipes and decide which one fits your skill level:

Chocolate – Fudge

http://startcooking.com/public/IMG_7958.JPG

Chocolate – Brownie Cupcakes – These would look beautiful individually wrapped with a nice big red bow tied on each one!http://startcooking.com/public/IMG_8803.JPG

Hershey Kiss Cookie

http://startcooking.com/public/IMG_5877.jpg

Rudolf’s Christmas Cookies

http://startcooking.com/public/IMG_8949.JPG

Chocolate Bark

http://startcooking.com/public/IMG_0480.JPG

Strawberries Dipped in Chocolate

http://startcooking.com/public/IMG_7866.JPG

Chocolate Chip Cookies

http://startcooking.com/public/ChocolateChipCookies_305.jpg

Decide how many cookies or pieces of fudge will make up a gift. Four is a good number to start with for an individual. Many cookie recipes, including my Hershey Kiss Cookie recipe, make 48 cookies. That’s 12 potential gifts right there! (By the way, the cookie jar in the above photo was my Mom’s cookie jar. From the age of about 5 years old, I was always the one who got their hand caught in the cookie jar!)

Of course there may be someone on your list that would prefer savory treat! Chicken Soup anyone?

Chicken Noodle Soup

http://startcooking.com/public/IMG_1113.JPG

3. Make up a grocery list

Check your food cupboard for the ingredients you may already have on hand. Be sure your ingredients are still fresh. Things like sugar and vanilla extract have a very long shelf life, but flour and walnuts will eventually go off even if stored properly. (Are those miniscule black dots in my flour actually moving????)

4. Decide on what’s the best way to wrap your food gift

This is a REALLY important step. You want your gift to stay fresh and still look fantastic.

Gift wrapping does not have to break the bank. Discount houses and craft stores sell really inexpensive and festive tin cans that are perfect for keeping home-made cookies fresh. A package of clear, cellophane, gift bags is also an option. You can synch the bags together with some festive yarn which is much less expensive than using ribbon. Your gift will look just like the way the gourmet shops wrap their sweet treats.

5. Startcooking!

All of my recipes are in a video or a photo-tutorial format. As they say, a picture is worth a thousand words!

Happy Holidays!

Kathy Maister

If you are new to startcooking, or are a regular visitor here, please consider subscribing for free.

Pecan Pie

posted in Sweets by Kathy Maister
Difficulty:
difficulty rating

Pecan Pie, chock-full of nuts, is a splurge that requires very little preparation time. However, you will need to plan for extra time at the gym after eating this mouthwatering dessert!

There are tons of recipe variations for a Pecan Pie. I’m sticking to a very classic recipe that calls for:

  • 3 Eggs
  • 1 cup of dark brown sugar
  • 1 cup of light corn syrup
  • 4 Tablespoons of melted butter
  • 1 teaspoon of vanilla extract
  • 1 1/2 cups of pecans, (6 ounces)
  • 1 frozen pie crust, (9 inch.)

Many people use unsalted butter in their recipes. You actually have more control of the amount of salt in a recipe when you add your own. If you are using unsalted butter, add 1/2 teaspoon of salt to this ingredient list.

Preheat your oven to 350 F. degrees and then get all of your ingredients measured before you begin mixing. In general, pre-measuring before you start to cook is a good habit to get into.

When measuring brown sugar always pack it into a dry measuring cup.

You can mix everything together with a whisk or a fork.

It should look like the photo below when everything is mixed together. Be sure there are no unmixed lumps of brown sugar.

Add the nuts

And give it a stir. The nuts will float to the surface. (Some recipes call for 2-to-3 times more nuts than my recipe.)

Set the frozen pie shell on a baking sheet with sides. Once the pie is cooked it will be MUCH easier to remove from the oven if it is on a baking sheet.

Now pour in the filling.

The pie is ready to go into your preheated oven.

Before you put it in the oven, cover the edges with a tin foil ring.

Normally you would cook a pie for about 15 minutes and then cover the edges. With pecan pie the crust gets too dark that way, so start with the edges covered. (See photo comparison at the bottom of this post.)

For about $4. you can buy reusable pie rings like the one on the pie in my oven.

As the pie cooks, it puffs up. This is normal. It will take about 40-45 minutes for the pie to bake.

To check for “doneness”, slide a small, sharp paring knife into the pie about 2 inches from the crust. It should come out clean. (If you have an “instant read” thermometer the internal temperature of the pie should reach 200 F. degrees.)

As the pie cools, it will slump down and the top will crack a bit.

I love Pecan Pie with vanilla ice-cream!

Enjoy!

P.S.

Below is a photo comparing the pie crusts. For the darker pie on the left, the tin foil went on 15 minutes into the baking time. It is too dark. For the one on the right, I put the tin foil on before putting it in the oven…and it’s perfect!

If you are new to startcooking, or are a regular visitor here, please consider subscribing for free.