Baked Potato with Salsa

posted in Lunch, Vegetarian by Kathy Maister
Difficulty:
difficulty rating

Baked potatoes are a quick and satisfying “comfort food” that CAN be healthy as well. Mary’s comment in “Cooking Potatoes in the Microwave” got me thinking about one of my favorite ways to eat baked potatoes.

In restaurants, you are often offered butter, sour cream, and bacon to go with your baked potato, and, of course, you can make them this way at home as a wonderful occasional splurge. But in my household, non-fat plain yogurt is more the norm. You get a similar “mouth sensation” without quite so many calories.

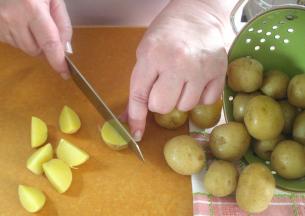
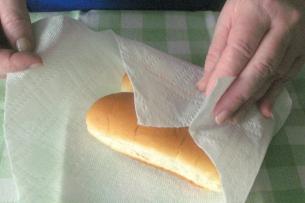
I bake the potato in the microwave, and carefully remove the hot potato from the oven. With a sharp knife, make a shallow slice down the length of the potato and then I give it a bash.

http://startcooking.com/public/images/IMGP2623.JPG

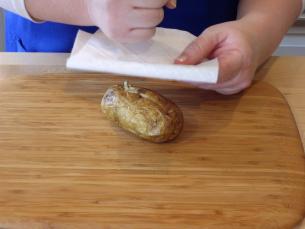
This breaks up the fibers and makes it all easier to spoon out or eat with your fork. (Note: Be sure you put a clean cloth or paper towel between your fist and the hot potato or you will get burnt).

Now give it a squeeze and the potato should be nice and fluffy.

http://startcooking.com/public/images/IMGP2628.JPG

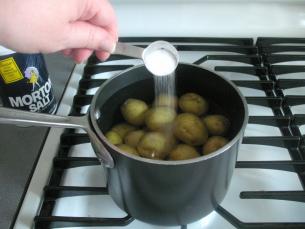
From there, I add a small sprinkle of salt and several twists from the pepper grinder.

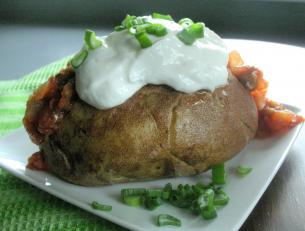
Sometimes I then add about 1/3 cup of salsa. If you haven’t tried salsa on your baked potato, you don’t know what you are missing. There are so many really great flavors of salsa; you really can’t go wrong with any of them! It’s not necessary to heat the salsa. The potato is so hot the salsa will actually cool it down to the perfect temperature!

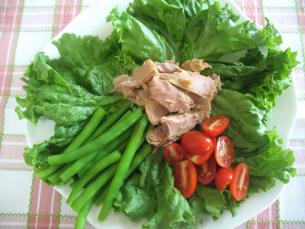
I then top it with about 1/3 cup of plain yogurt. If I have green onions in the house, chop them up and add them too. It looks great, and the flavor is fantastic!

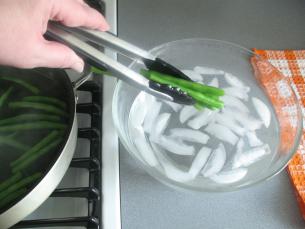
When cutting green onions, remember the white part is much stronger than the green part!

What’s your favorite baked potato topping?

If you are new to startcooking, or are a regular visitor here, please consider subscribing for free.

Salad Nicoise

posted in Lunch, Soups, Salads, Sides and Sauces by Kathy Maister
Difficulty:
difficulty rating

Of all salads, Salad Nicoise is my favorite! If it is on the menu, I inevitably order it! It has the perfect combination of foods – lettuce, tomato, green beans, hard cooked eggs, potatoes, black olives, capers, and tuna fish.

Pour on your favorite vinaigrette dressing, and the meal is complete!

For two servings you will need:

Step # 1 – Cook the eggs

Check out my 30-second Tips and Techniques Video on How to Boil an Egg. You can do this step well in advance, as hard cooked, unpeeled eggs will keep for about a week in the refrigerator.

Step # 2 – Cook the potatoes

Carefully drop some small potatoes (see below) into boiling water, adding some salt. Return the water to a boil and set the timer for about 12 (to 15-18) minutes. Before you remove them from the pan, stick a fork in them to make sure they are tender.

Cut the potatoes into bite-size pieces.

Step # 3 Blanch the green beans

“Blanching” means that you drop the green beans into a pot of boiling, salted water and let them cook for about 2 minutes. Remove them with a pair of tongs and immediately plunge them into a bowl of water with ice.

The ice water will stop the cooking process and keep them a nice bright green.

Step #4: Assembe the salad

(Be sure to wash the lettuce!) Spread the lettuce out on a plate.

Add the rest of the ingredients in clumps. It has a lot more “eye appeal” that way!

I splurged and bought imported tuna from a jar. It was expensive ($7) but worth every bite.

Sprinkle the capers over the salad.  In the photo above, those are capers in the white dish shown with the tuna fish. They have a unique, almost peppery-salty taste that works really well in combination with all the other flavors of this salad.  Capers are packed in brine and should be rinsed before you add them to the salad.

Once everything is added, serve this wonderful salad with your favorite vinaigrette dressing.

Oops! I almost forgot the black olives!

Enjoy!

If you are new to startcooking, or are a regular visitor here, please consider subscribing for free.

How To Make Hot Dogs

posted in Appetizers and Snacks, Lunch by Kathy Maister
Difficulty:
difficulty rating

Hot dogs  cooked in the microwave oven are a quick and easy snack, lunch or dinner.  (Fenway Franks are my favorite but turkey dogs are also pretty great as well!)

Let me begin by stressing that all microwaves have different strengths. They range in power from 500 watts to over 1500 watts. Just inside the frame of your microwave door there should be a label indicating the strength of your microwave.

Knowing the strength of your microwave is very important. Otherwise you may be following cooking directions exactly and still end up with burnt popcorn or an under cooked baked potato! I have an 850 watt microwave oven. All of my directions are based on that wattage.  (Here is a great microwave wattage conversion chart.)

Hot dogs are already cooked when you buy them. All you need to do is heat them up. Place 1 to 4 hot dogs on a paper plate or a microwave-safe dish with a paper towel. (If you are cooking more than 4 hot dogs, do it in stages.)

With the tip of a sharp knife, pierce the hot dog three times; on one end, in the middle, and on the other end. You only need to break the skin. This allows the steam to escape so they don’t explode!

Cover the hot dogs with another paper towel.

Cook on high for 35 seconds. That should be enough to heat them through, but you may have to add another 10-15 seconds.

Remove the hot dogs from the microwave.

Wrap the bun in a paper towel and zap it for about 15 seconds.

You only want to warm the bun. If you over cook the bun in the microwave it will get very hard and chewy as it cools.

I don’t recommend putting the hot dog in the bun and heating everything at once. The steam from hot dog makes the bun very soggy.

For a real treat try toasting the hot dog bun under the broiler. It will make the bun a bit firmer and able to hold all the extras you’re going to pile on!

I like my hot dogs with ketchup, mustard and relish…hold the onions please!

If you are new to startcooking, or are a regular visitor here, please consider subscribing for free.