


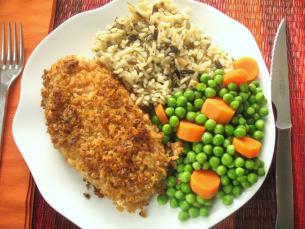
I’m always on the look-out for quick and tasty ways to cook chicken. Today’s recipe is based on coating boneless chicken breasts with French-fried onions from a can and then the chicken is baked in the oven.
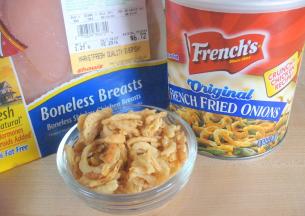
Many of you may well have tried the classic green bean recipe made with these onions. I’m going to use these fried onions to coat boneless, skinless chicken breasts. What I need is some sort of “glue” to make the fried onions stick to the chicken.
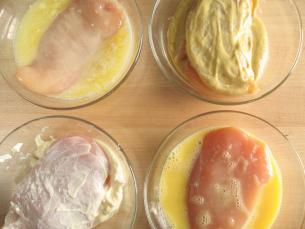
For the fun of it, I tested 4 different possible “glues”:
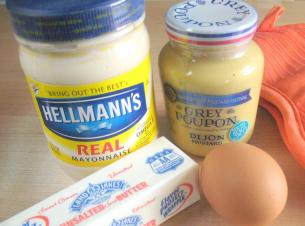
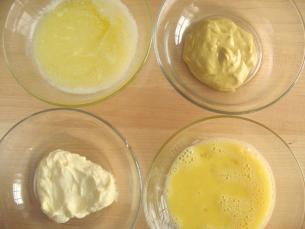
Melted butter, mustard, mayonnaise, and a beaten egg all work beautifully. You get to choose which one to use depending on what you have in your kitchen! (I’ll tell you my preference at the end!)
I put just one chicken breast in each of different “glues”, making sure to coat both sides.
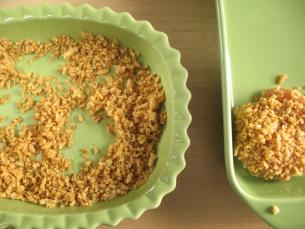
Now for the onion coating. The recipe on the box of fried onions calls for one egg, 4 chicken breasts and 1 1/3 cup of onions. There is no possible way you can cover four chicken breasts with that amount of coating and have it end up looking like the photo! I used 2 cups of crushed onions and that worked just fine.
VERY IMPORTANT NOTE:
Be sure to throw away any leftover “glue”. The egg (or butter, or mayonnaise, or mustard) has been contaminated with bacteria from the raw chicken and cannot be re-used.
The onions do need to get crushed into crumbs. The easiest way to do this is to put them in a baggie, seal it, and then just crush the onions with your hands.
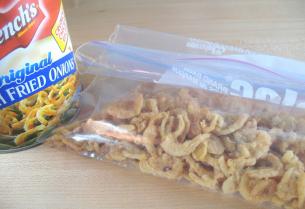
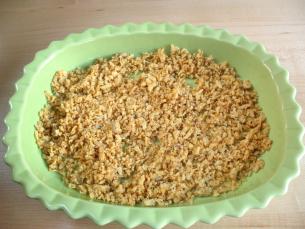
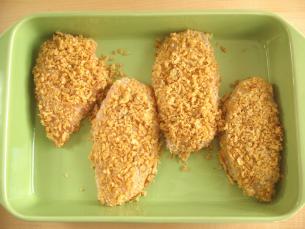
You could then just add the raw chicken breasts to the bag and pat on the coating. Because I used four different “glues” I put the crushed onions in a shallow dish with sides.
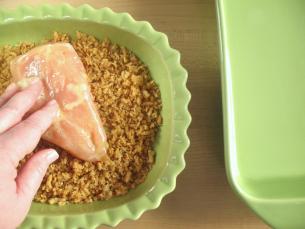
From there I patted on the onion crumbs to both sides of the chicken breasts.
Next, I put the chicken into an ungreased baking pan.
Be sure to place the chicken, with what was the shiny side, up. This way looks better once it is cooked.
This is what the chicken will look like when it is ready to go in the oven. No one “glue” looks different from the other. They all look the same at this point.
Coatings: Egg…Butter…Mayonnaise…Mustard
Bake the chicken in a 400-degree oven for approximately 20 minutes or until it is no longer pink on the inside. (The chicken breasts I used each weighed 5 ½ ounces.)
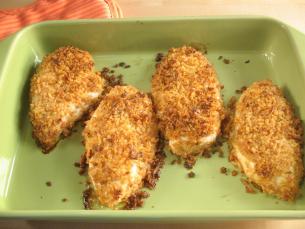
Oven Baked for 20 Minutes
The mustard-dipped chicken on the far right came out of the oven slightly less browned than the others. That makes sense as there is no fat in mustard to help in the browning process.
Now for the official taste test! (That means my husband and I took a bite of each piece of chicken to see which one we like the best.)
The mustard coating had a really tangy flavor which was our least favorite. The mustard overpowered the flavor of the onion coating.
The remaining three all tasted pretty much the same, but the butter and the mayonnaise coating made the chicken breasts seriously moist.
(But you are adding extra calories with all that added fat!)
The egg coating was good but not quite as moist as the butter and mayonnaise coating.
My conclusion is to use the egg coating but for company try the butter or mayonnaise coating.
Cheers!
P.S.
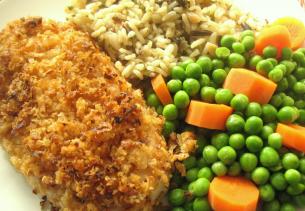
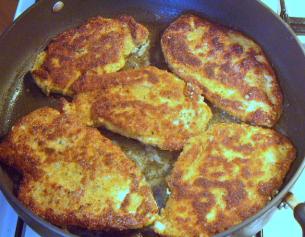
Chicken Cutlets show below…
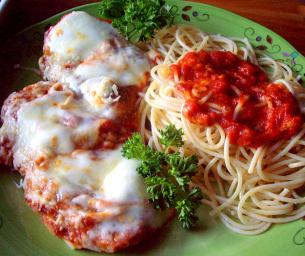
and Chicken Parmesan are two more great ways to cook up boneless chicken breasts.
If you are new to startcooking, or are a regular visitor here, please consider subscribing for free.


chris whalen said:
Thanks for all your great emails. I really appreciate them. I send all of them to my daughter who is a newly wed and just starting to cook. On my last several emails I have been only able to pull up the text. I can’t pull up the web sites and click on the colored words like I used to. Are you sending them differently, or am I doing something wrong?